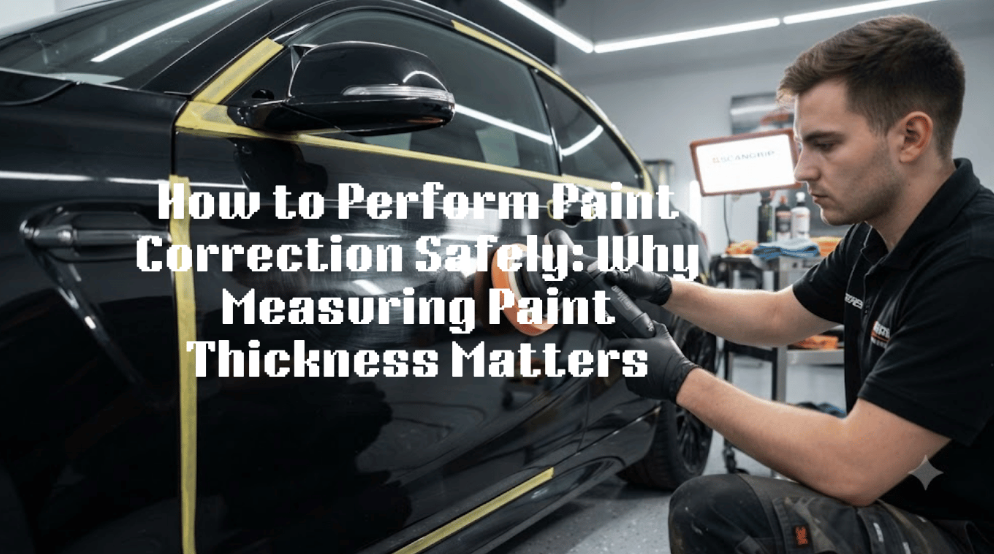
Paint correction is one of the best ways to make your car look shiny and free of swirl marks, light scratches, oxidation, and other paint imperfections. However, polishing isn’t just about making your car look better. The clear coat is removed a tiny bit with each polishing. Its removal may cause permanent damage to the paint if the amount is too large. This is why professional detailers always measure the paint thickness before beginning any correction work.
This guide will show you how to safely perform paint correction, the importance of paint thickness and how professionals keep your vehicle safe during paint correction while maximising the finish.
What Is Paint Correction?
Paint correction is a professional detailing procedure that uses machine polishing to eliminate blemishes from your vehicle’s paint. The defects are not covered with a wax or filler coating, but are completely diminished or eliminated through careful polishing of the clear coat.
Paint correction can improve:
- Swirl marks
- Light scratches
- Water spots
- Oxidation
- Holograms
- Dull and faded paint
However, it cannot repair deep scratches that penetrate the clear coat, stone chips, or peeling paint. These types of damage usually need repainting.
Is Paint Correction Safe?
Yes, paint correction is safe when it is performed correctly.
Professional detailers don’t just use an aggressive compound on the whole car. Rather, they check the paint, measure the thickness and then apply the least aggressive polishing process possible to eliminate defects.
This method not only enhances the appearance of the paint but also ensures the clear coat remains in good condition, preserving the finish for years.
What is Your Car’s Paint System?
Modern vehicle paint consists of several layers; each serves a different purpose.
Primer: Helps the paint stick to the body and protects it from corrosion.
Base Coat: Gives the vehicle its colour.
Clear Coat: The upper transparent layer of paint, used to preserve the paint colour and provide the desired level of gloss.
During paint correction, only the clear coat is polished. This layer is not very thick, and taking too much off can leave your vehicle’s paintwork vulnerable. That’s why proper paint thickness measurements prior to polishing are important.
How to Perform Paint Correction Safely
Professional paint correction is carried out with great care and precision to ensure the highest-quality results while preserving your vehicle’s paint.
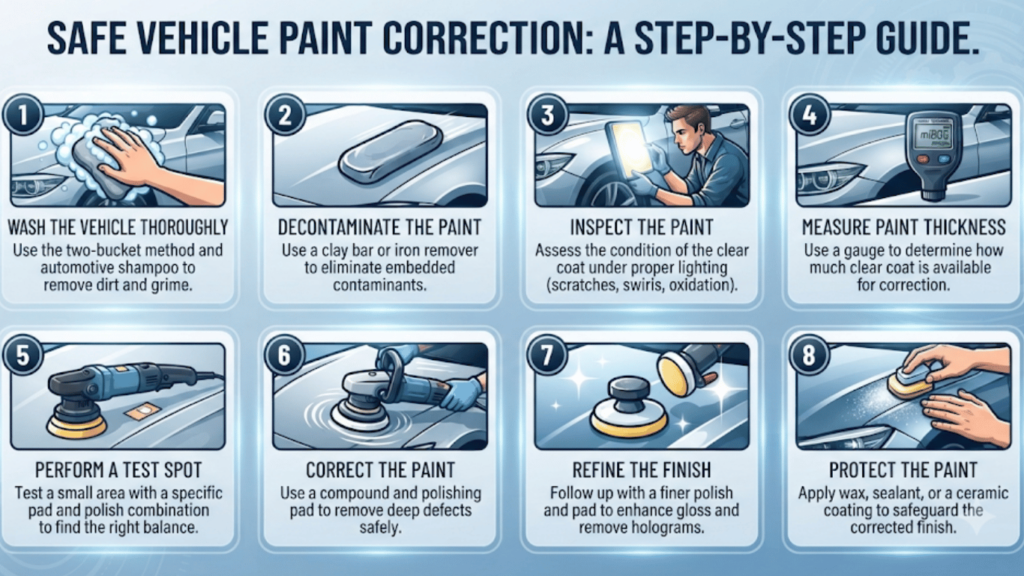
Step 1: Wash the Vehicle Thoroughly
A safe washing method should be used to remove dirt, dust, mud and road grime first. Cleaning the car properly avoids additional scratches caused by loose contaminants during polishing.
Step 2: Decontaminate the Paint
After being washed, these paint surfaces can still contain any of the following contaminants that are difficult to remove from paint: Tree Sap, Iron Particles, Tar, and Industrial Fallout. These particles are removed with a clay bar and special decontamination products, and the surface is smoothed.
Step 3: Inspect the Paint
Paint is examined under appropriate light conditions to reveal any defects, such as scratches, oxidation and swirl marks. This inspection helps to identify the level of correction needed.
Step 4: Measure Paint Thickness
To ensure the paint is of the correct thickness, a paint thickness gauge is used prior to polishing. This helps the detailer determine the areas that are thin, previously repaired, and repainted, and select the most appropriate polishing method.
Step 5: Perform a Test Spot
The least aggressive polishing pad combination and compound are used to polish a small part of the vehicle. This test is used to ensure that the correct method is being used to fix the paint without stripping more than necessary.
Step 6: Correct the Paint
After the safest process is found, the other panels are carefully polished. The aim is to eliminate imperfections without losing too much of the clear coat.
Step 7: Refine the Finish
The finishing polish helps maximise gloss and clarity, and eliminate any light haze that may have remained from the correction stage.
Step 8: Protect the Paint
Once the correction is done, the paint is covered with a paint sealant, wax or ceramic coating. This keeps the finish, makes it shine and prevents UV damage, dirt, water and environmental cleansers from affecting the vehicle.
What Is Paint Thickness?
Paint thickness is the total depth of your vehicle’s paint system, including the primer, base coat, and clear coat. It is usually measured in microns using a paint thickness gauge. Since paint correction removes a small amount of the clear coat, knowing the paint thickness helps detailers determine how much correction can be performed safely.
Why Paint Thickness Matters
Paint thickness refers to the overall thickness of your vehicle’s paintwork, which is made up of the thickness of your vehicle’s base coat, clear coat and primer. Typically, it is measured in microns with a paint thickness gauge. Paint thickness is important because it indicates how much clear coat paint is removed during paint correction, and knowing how much you can safely remove is crucial.
Checking paint thickness helps professionals:
- Protect the clear coat from unnecessary removal.
- Identify panels that have been repainted.
- Detect areas with thinner paint.
- Choose the safest polishing method.
- Deliver better results without increasing the risk of damage.
Skipping this step may lead to over-polishing and, in turn, long-term damage to the paint and reduced protection.
What Is a Paint Thickness Gauge?
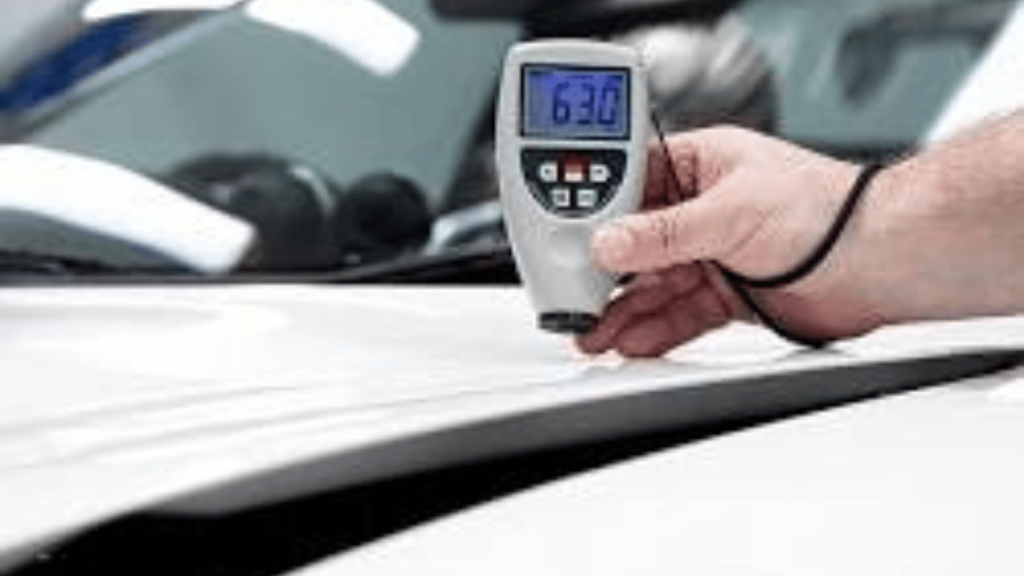
A paint thickness gauge is an instrument designed to measure the overall thickness of the paint layer on a vehicle.
The gauge measures the thickness of the paint in microns (µm), enabling the technician to compare panels. Although the gauge displays numbers for the overall coating rather than the clear coat, experienced detailers still depend on these readings to detect odd changes that could be a sign of previous repairs or thin paint.
Why Professionals Measure Paint Thickness Before Every Correction
Each vehicle is unique. Paint thickness readings can vary between two cars of the same make and model due to manufacturing tolerances, prior repairs, or prior polishing. Which is why professionals measure paint before each correction, rather than assuming it.
- Prevents clear coat damage
- Identifies previous repairs
- Helps choose the right correction method
- Creates consistent results
How to Measure Paint Thickness
Step 1: Clean the Surface
Thoroughly wash and dry the vehicle before taking measurements. It can be affected by dirt and other contaminants, causing inaccurate readings.
Step 2: Calibrate the Gauge
The paint thickness gauge is calibrated per the manufacturer’s instructions before use. Calibration guarantees accurate measurements.
Step 3: Measure Multiple Areas
Readings should be taken on each panel – bonnet, roof, doors, guards and boot. A number of readings should be taken on each panel to obtain an accurate reading.
Step 4: Compare the Results
Identify noticeable differences from panel to panel. If the size range is large, it may be a result of repairs, repainting, or excessive polishing.
Step 5: Plan the Correction
Based on the readings, determine the safest approach for correcting each panel. If the paint is thinner in some spots, a gentler polishing method can be used.
Common Paint Correction Mistakes to Avoid
The correct tools, techniques and experience are necessary for paint correction. It is better not to rush the process, as it can cause further damage.
Some of the most common mistakes include:
- Skipping paint thickness measurements.
- Using an aggressive compound unnecessarily.
- Polishing dirty paint.
- Applying too much pressure with the machine polisher.
- Spending too much time on panel edges and body lines.
- Using dirty or worn polishing pads.
- Failing to perform a test spot before correcting the entire vehicle.
Why Paint Correction and Paint Thickness Measurement Matter in Melbourne
Melbourne’s changing weather and road conditions can take a toll on your vehicle’s paint. Over time, paint defects are caused by strong UV exposure in the summer, bird droppings, tree sap, industrial fallout, road grime and water spots.
A significant number of Melbourne drivers also drive on busy roads and freeways where dust, debris, and small rocks can cause small marks and scratches. This is one of the reasons professional paint correction is a great option for getting your car back to its original condition.
However, each car is painted differently. Some vehicles might have been repainted after the crash repair or machine polished. Pre-correction paint thickness measurements are taken to ensure the safest approach for all vehicles, preserving the paint and delivering outstanding results.
Professional Paint Correction in Melbourne
Professional paint correction is more than just polishing a vehicle. It starts by examining the paint for defects, the condition of the clear coat and what method is safest to correct the paint. Experienced detailers can restore the gloss without compromising your vehicle’s finish using professional tools, techniques and paint thickness measurements.
We take this careful approach with all of our vehicles at Wills Car Detailing. Our experts measure the paint thickness before correction, select the least aggressive polishing method, and use premium products to safely remove swirl marks, light scratches, oxidation, and other imperfections from the paint. From sweeping lighting to multi-stage enhancement, we deliver professional results while preserving your car’s finish.
Why Choose Wills Car Detailing For Paint Correction in Melbourne
Wills Mobile Car Detailing is a professional mobile car detailing company that focuses on both appearance and long-term paint protection.
Our service includes:
- Professional paint inspections.
- Paint thickness measurements before correction.
- Safe machine polishing techniques.
- High-quality detailing products.
- Attention to every detail.
- Honest recommendations based on your vehicle’s condition.
Wrap Up
Paint correction is an effective solution to achieve a brilliant look for your car, but it is best when done in the right way. Before polishing, measuring paint thickness helps protect the clear coat, avoid unnecessary paint removal, and determine the safest correction method for your vehicle. When used with the proper equipment and methods, it delivers durable, high-quality results.
If you’re looking for safe, professional paint correction in Melbourne, Wills Car Detailing has the expertise and equipment to restore your vehicle’s finish while protecting its paintwork. Call us today to schedule a paint evaluation and correction service.
Frequently Asked Questions
Does paint correction remove scratches permanently?
Carefully removing the clear coat allows paint correction to permanently remove or significantly reduce light scratches and swirl marks. If the clear coat is over deep scratches, repainting is likely necessary.
Can paint correction damage my car’s paint?
When performed correctly, paint correction is safe. Professional detailers use the thinnest possible polishing method to avoid damaging the clear coat and measure paint thickness.
How often should paint correction be done?
Most vehicles only need paint correction occasionally. Proper washing techniques and regular paint protection keep the paint in good condition and minimize the need for frequent paint correction
Is measuring paint thickness really necessary?
Yes, measuring paint thickness helps determine whether the paint can be polished safely and allows professionals to choose the most suitable correction method.
Should I get paint correction before ceramic coating?
Yes, paint correction removes imperfections before the ceramic coating is applied, allowing the coating to bond to a smoother surface and lock in a high-gloss finish.